As a WooCommerce store owner, you must have a good understanding of WooCommerce product settings and options. If you understand all WooCommerce product settings, you’ll know how to edit products and prepare them for your marketing campaigns.
In this post, we’ll go through all the options of the products section under WooCommerce Settings.
First, click on WooCommerce in your sidebar and click Settings. Select the Products Tab.
Exploring the Products Tab

Shop page
The first option we have here is to set up the shop page. This is the part where all of your products are displayed.
If you have gone through the setup wizard, the dropdown will display a shop page that can be selected.
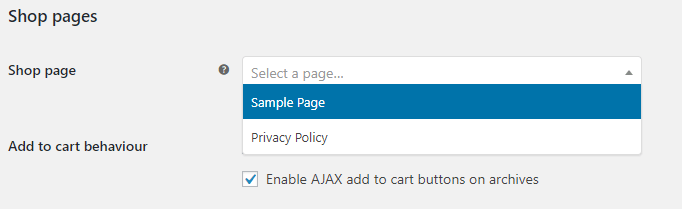
If you’re going through the settings for the first time, you won’t have the default WooCommerce pages. The dropdown will allow you to set up a sample page and the Privacy Policy.
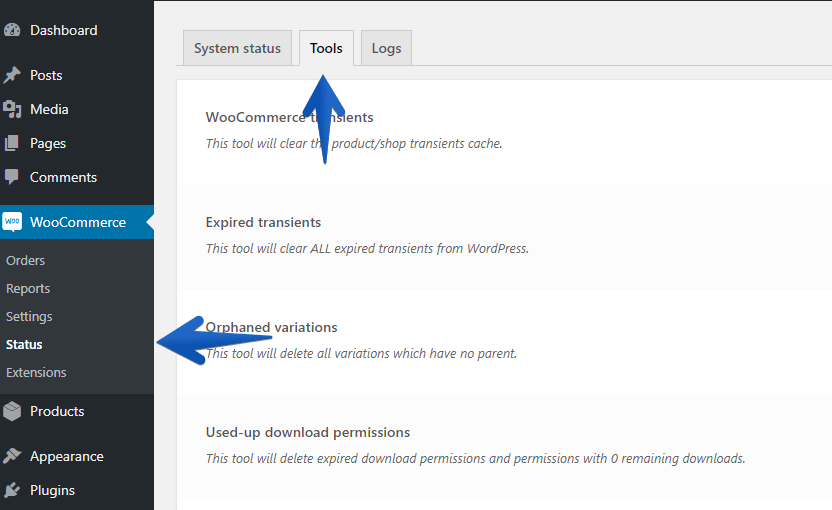
You can simply create all of the WooCommerce default pages by clicking Status (under WooCommerce in the sidebar), and then selecting the Tools tab.
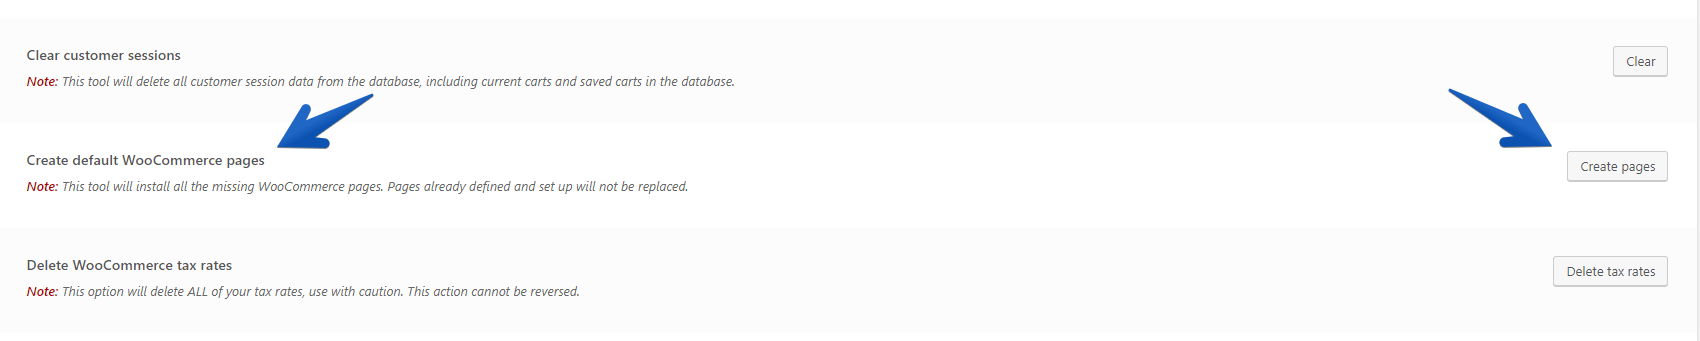
Plus, simply scroll down until you see the option that says Create default WooCommerce Pages and click Create Pages.
This will create a few pages including:
- Shop page – the collection of all your products
- Cart page – a page containing the shortcode to display the cart
- Checkout page – a page with the checkout and payment options
- My Account page – the page where customers can log in and see their orders and personal details.
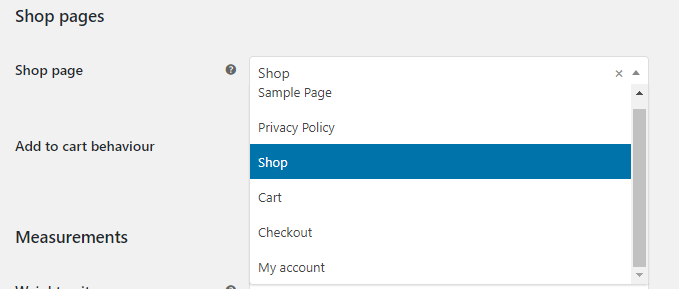
Now if you go back under WooCommerce in the sidebar to Settings, and Products, you will see there’s the option to select Shop as the Shop Page. You will also see the other default pages that you’ve created.
More importantly, the shop page is your product catalog.
Add to Cart Behavior
Here, you can choose to redirect customers to the cart each time they add a new product.
Alternatively, you can enable AJAX add to cart buttons on archives. This simply means that customers who add products to cart on your shop page will remain on your shop page without needing to refresh the page.
Measurements
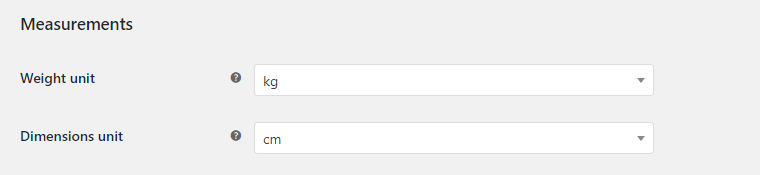
You can also select the units of measurement for all displayed products. Simply click the dropdown buttons and choose the measurement that you want.
Reviews
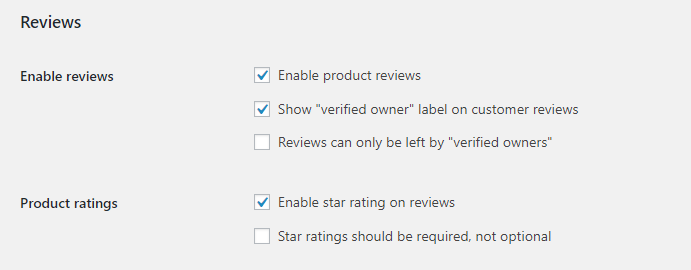
The Review section displays relevant customer reviews about your products. Reviews are an important part of an online store since they can potentially impact the purchasing decision of all customers!
The Review section offers various options:
Enable product reviews – lets customers leave reviews on products.
Show “verified owner” label on customer reviews – WooCommerce will check if an order has been made by the email address of the reviewer. If they have made an order, their review will have a “verified owner” label. This label clearly shows potential customers that the review is legitimate.
Reviews can only be left by “verified owners” – Customers will only be able to leave a review using the same email address that they used to purchase your product.
Next, you can set your product ratings options. Plus, you can enable star ratings on reviews, allowing your customers to give rankings to your products.
You also have the option to make star ratings required, rather than being optional. However, it might be better not to force people into giving a rating, especially those who might not have purchased your product, but just want to leave a comment.
NOTE: Always make sure you click Save Changes before moving to the next section!
Inventory
Inventory is the next tab under the product settings. This tab pertains to the general inventory options of your WooCommerce store.
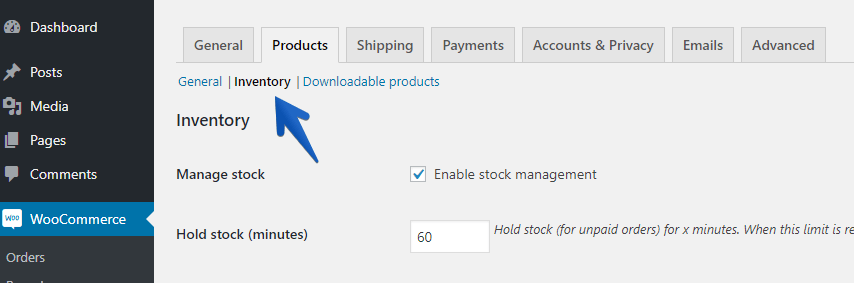
Manage Stock
The Manage Stock option allows you to enable stock management. This setting will allow WooCommerce to keep count of the physical products in your inventory. Whenever your store makes sales, WooCommerce will automatically detract the items from the inventory’s total stock.
Keep in mind that the Manage Stock setting is mostly relevant for physical products. If you’re selling both physical and digital products, you can enable stock management on the individual products themselves.
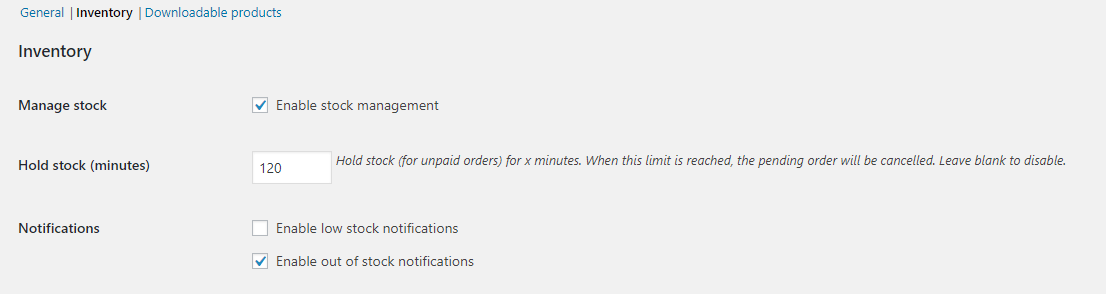
Hold Stock
The Hold Stock (minutes) option in WooCommerce allows you to set a time limit for stock to be reserved for unpaid orders. This setting ensures that after a customer has gone through the checkout process and created an order, the stock is held for that unpaid order for the specified amount of time.
Essentially, when a customer completes the checkout process and creates an order, WooCommerce will reserve the purchased items from the inventory for the designated time. This prevents overselling your products and ensures accurate tracking of available stock.
One drawback of the Hold Stock setting is the possibility that a product may not be available for other potential customers while it is reserved for an unpaid order, especially if it’s the last item in stock.
The duration you choose for this option should ideally reflect the average time you anticipate customers spending on your site before completing their undervalued transactions.
If you leave this section blank, customers will have an unlimited time to complete their payments for orders, which could lead to product reservation without purchase. To avoid this, it is recommended to set a reasonable time limit for the Hold Stock setting.
A better solution – would be to use Reserved Stock Pro, to securely lock stock in the individual customer cart for a limited time with a countdown. This method fixes race conditions in the checkout and also encourages customers to pay for their orders straight away.
Notifications
Next is the option to enable low stock notifications and enable out of stock notifications.
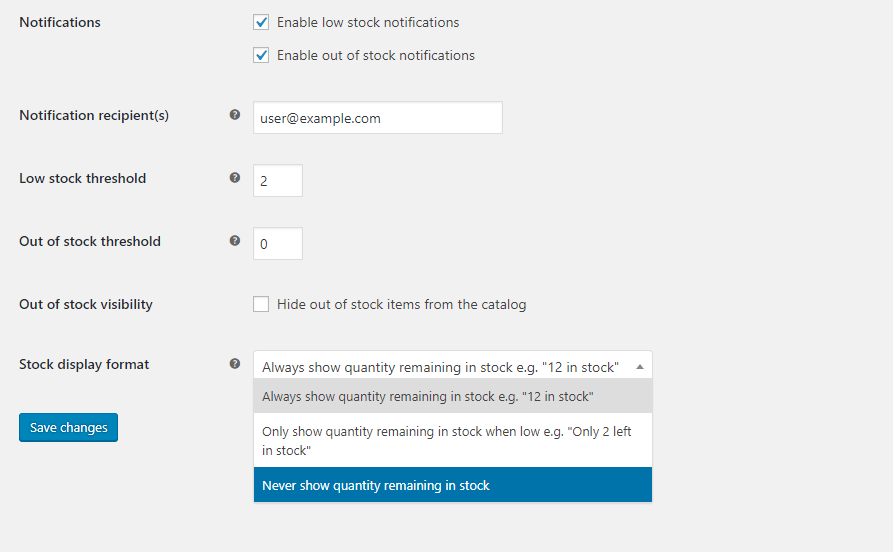
Low stock notifications will give you information if a specific product is low in-stock. On the other hand, no-stock notifications will inform you if the product is out-of-stock.
Stock Thresholds
You can also set your low stock threshold (a point where you think a product is low stock) and out of stock threshold (a point where a product is out of stock, naturally set at 0).
Additionally, you can choose to hide products from the catalog when they are out of stock by selecting out of stock visibility.
It’s also possible to allow customers to see how many items are left in stock. You can choose to only show stock numbers when they hit the low stock threshold (hit them with the fear of missing out factor) or you can choose to never show your customers how much stock you have.
Exploring the Downloadable Products Tab
Click the last tab to access the downloadable products settings.
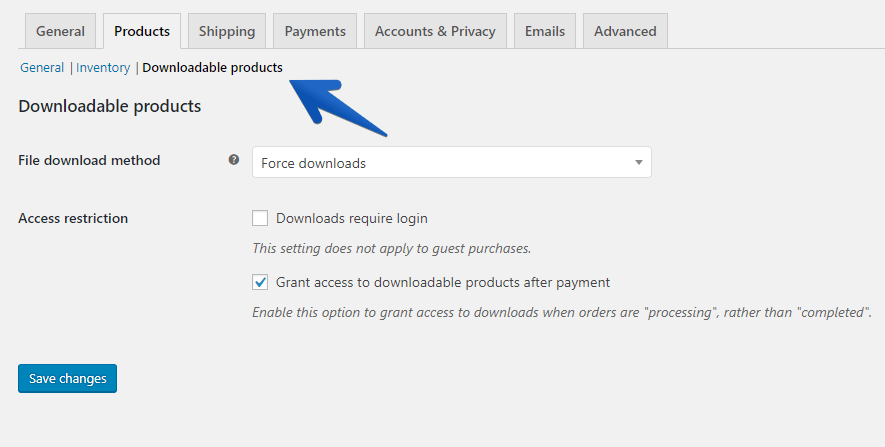
File Download Method
Force downloads is a secure way of downloading files because it won’t give people a direct link to the file. Your file will be downloaded in the customer’s browser using a protected link.
X-Accel-Redirect/X-Sendfile is the most reliable and secure method that’s handled by the server. You’ll have to install a module to use this option, so only use it if you know that it’s available on your server.
Redirect only is an unsecured way of downloading where customers are transferred to a page with a link to the file. Customers could share this link with all their friends or all of Reddit if they wanted to, so you might not want to choose this option.
Access Restriction
The Access Restriction section has two important settings that you can toggle.
Downloads require login – This simply means that customers will have to create an account on your site and log in to download your product. However, this setting won’t apply to guest purchases. So if you want to force everyone to log in, then you’ll have to disable guest purchases.
Grant access to downloadable products after payment – Ticking this option means that customers will receive your downloadable products immediately after they paying, whether you have received and verified the payment or not. It’s probably better leave this option so that customers only receive their download after their payment has been verified.
Conclusion
Editing WooCommerce’s product settings is a great way to increase the effectiveness of your online store. As your store continues to grow, you can try adjusting the settings to match your preferences. If you’re unsure about an option, you can always check the WooCommerce product setting documentation to learn more.