Two of the most important things in e-commerce are speed and efficiency. If a store is fast and efficient, it can satisfy many customers and lead to better sales. However, many web users and store owners are virtually unaware of the necessary tricks to improve the general performance of their stores.
One common yet underutilized and misunderstood method of improving a store’s efficiency is caching. Through this method, your WordPress site and WooCommerce store can have improved loading times and greater stability.
If you’re eager to learn more about WooCommerce caching, we’ve got you covered. This article will help you understand the basics of caching. Plus, you will also learn about some notable caching tricks and side effects.
What is Caching?
Basically, caching is a method of speeding up your website by saving a copy of the information that has already been created. You can think of caching as ‘making a screenshot’ or ‘making an imprint’ of specific data.
Since caching can improve load times, speed, and stability, it is definitely an important method for SEO. But before opting to use caching, you must understand the different caching techniques as well as its advantages and disadvantages.
What Are the Different Types of Caching?
Caching is divided into different types. Knowing these types will help you pick the option that will maximize your WooCommerce store’s efficiency.
Page Caching
Full page caching is also known as output caching. This method works by storing the full HTML page after it is created. Once your page receives a visitor, it will show the cached HTML instead of recreating the entire page. Comparably, output caching is like showing a ‘screenshot’ to another person.
Here’s a breakdown of the page caching process:
1. Someone visits a website and a request for web page is made

2. After the request, the site shows the cached page. A WooCommerce store, for example, might show a sales page that consists of products, offers, stock quantities, and relevant images.
How to Set Up Page Caching?
You can set up a WooCommerce Page Cache by using a functional plugin like W3 Total Cache and WP Rocket. Keep in mind that W3 is free while WP Rocket is a premium option.
1. Install the desired page caching plugin.
2. Be mindful of caching dynamic content. A fully functional WooCommerce store has different dynamic pages like Account, Checkout, Cart, and Product Features. Dynamic pages are likely to change over time, especially if the store is busy. Therefore, if dynamic pages are cached and shown to visitors, they might deliver outdated or misleading information.
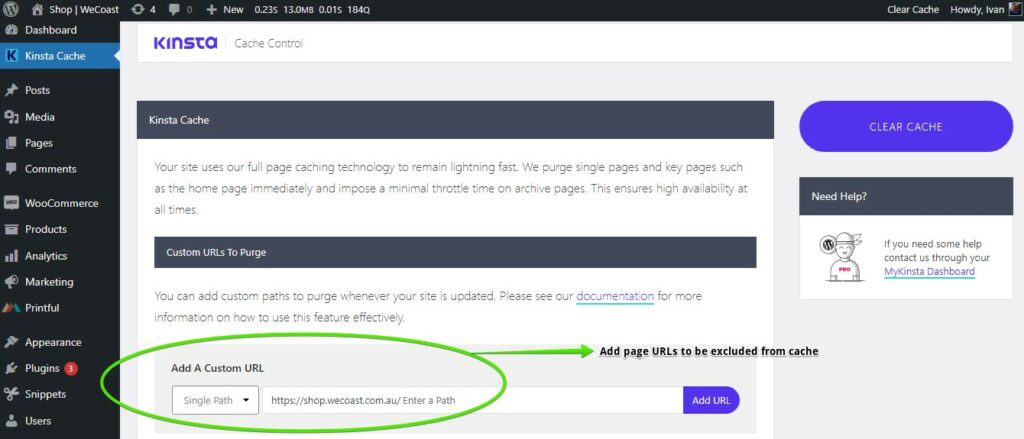
3. Most caching plugins have options to ignore dynamic pages and have a list of excluded pages/URLs by default. However, you should always double-check, and exclude additional pages manually from your WordPress dashboard.
Object Caching
For high-traffic websites and thriving WooCommerce stores, object caching is essential. If your website pages don’t load within 5 seconds, visitors will leave and create a higher Bounce Rate for your site or store.
Now, object caching is a different type of caching. In this method, queried data is stored to be reused later. The method skips a lot of repetitive server processing, thus speeding up load times and content delivery.
For example, let’s say that your website is displaying 25 of your best-selling products on the front page. This is an intensive database query because the website needs to calculate the number of sales for EVERY product.
Imagine if 1,000 people visited your website’s front page at the same time! The website needs to run the querying process 1,000 times in just a few seconds. If the server is not powerful enough, the website will definitely crash.
Since object caching saves the data (result of the query) for future use, it allows the server to run the query process only once. The other 999 people out of 1000 visitors will be able to see the products swiftly.
Keep in mind that object caching is perfect for stores or websites that rely on dynamic data such as eCommerce stores. On the other hand, page caching is excellent for static pages (or pages that don’t change much).
How to Set Up Object Caching
WordPress has built-in support for object caching with a class known as WP_Object_Cache. This method automatically stores data in PHP memory, preventing repeated website queries when the page loads.
However, the cached queries are not persistent for multiple page loads. The new object cache is rebuilt for every page loaded.
To take full advantage of object caching, you need a place to store the cache so it can be used for multiple requests. Some tools that you can use are Redis and Memcached. These tools will essentially act as a database for storing object cache that your website can quickly retrieve.
Persistent Object Case with WordPress & Redis
Let’s look at the popular Redis database as an example.
Redis needs to be installed and running on a server. Usually, it’s installed on the same server as your website.
While some hosting solutions include a Redis database for a monthly charge, others include Redis freely in their service bundles. SpinupWP is an example of a hosting provider that offers built-in Redis integration.
Keep in mind that Redis is a database and will use server resources to keep running. Fortunately, Redis is well-optimized and will offer more benefits in terms of object cache storage.
Next, we need a way to connect WordPress and pass the WP_Object_Cache into Redis. That’s why we need to install the Redis Object Cache Plugin created by Till Krüss. You must enable the object cache by going to Settings > Redis or Network Admin > Settings > Redis under Multi-site steps. Alternatively, you can use the WP CLI `wp Redis enable` command.
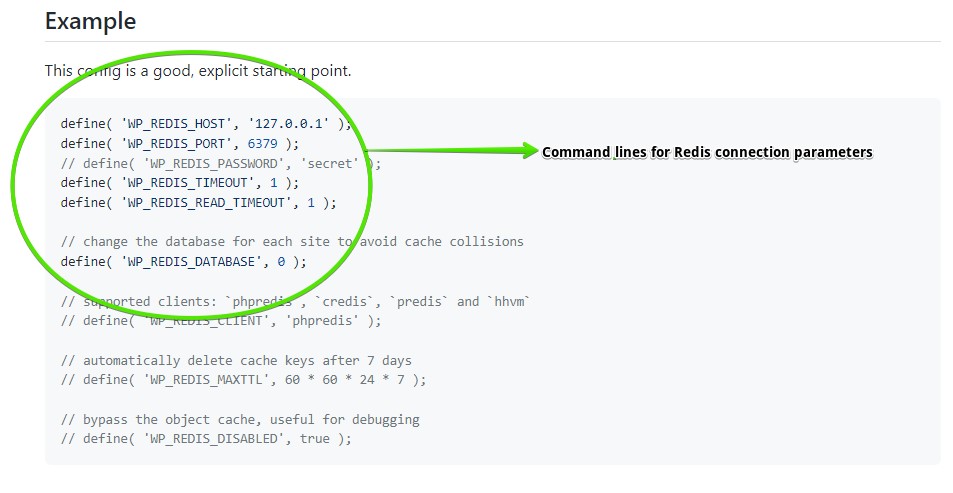
You can also adjust the Redis connection parameters if needed. It’s possible to use different Configuration Constants such as WP_REDIS_SCHEME (default TCP) and WP_REDIS_HOST (target server IP).
Opcode Caching
Opcode caching or OPcache is a caching method that’s typically built into PHP and included by most hosting providers. The method works by creating a human-readable PHP file (also known as opcode) and saving it in the server memory. Afterwards, the server will load the opcode whenever a visitor lands on the website.
While there are other Opcode caching methods such as APC and Xcache, OPcache is the most suitable option for PHP 5.5. APC is still popular but it doesn’t have a stable backing in terms of PHP version updates. Xcache, however, is commonly used as a PHP accelerator.
How to Set Up OPcache?
It’s advisable to get PHP version 5.5+ for your website. In this way, you won’t have to worry about bugs or technical discrepancies. If your site’s PHP is updated, it will have OPcache enabled by default.
While most hosting servers have PHP enabled, some might require manual activation. This guide will teach you how to activate PHP for your website host.
CDN Caching
CDN (content delivery network) caching is a method that relies on caching content and files through different edge servers around the world. These servers are usually located near the users who are accessing the website. CDN servers are physically closer to end users than main servers, guaranteeing fast content delivery.
Files that could be cached on the edge include:
- Images
- Javascript files
- CSS files
- and more
CDN caching is typically offered by respective providers like Cloudflare and BunnyCDN. Cloudflare provides free CDN caching service while Bunny offers flexible pricing that allows users to manage their content cache options.
Browser Caching
Browser caching is an automatic process that allows web browsers to cache files, data, and cookies on your website. The browser will then load the saved resources whenever a user visits the website. Subsequent visits will also become faster because of the browser’s saved files and data.
Even though browser caching is effective, it’s far from perfect. Your browser might encounter issues such as wrong data retrieval, update discrepancies, security mishaps, and some slowdowns. To maximize the effectiveness of browser caching, you can use Expiry Headers and Cache Control.
What are the best Cache Settings for WooCommerce?
Caching plugins have different configuration options, and they are not all the same. However, you can always use some beneficial cache settings for your WooCommerce store or site.
You can try out these cache plugin settings:
- Bypass cache when the following WooCommerce cookie is present woocommerce_items_in_cart
- Bypass cache for all logged-in users
- Bypass cache on query strings
- Bypass cache for these URLs.
- /checkout
- /cart
- /account
- /wp-admin
- /wp-login
- Purge cache on product or post updates
- Purge cache when a new post is published
- Purge cache on plugin install
- Purge cache on plugin update
Are you experiencing weird WooCommerce issues? It could be related to cache. We’ve written a guide to help you identify and fix common WooCommerce cache issues.
Load testing
It’s time to measure how the cache improved your website’s speed and server performance. A common technique is to use a website speed testing tool such as https://gtmetrix.com. However, Gtmetrix will only give you the performance of a single page load.
eCommerce stores need to measure their performance by simulating real-world visitors using a technique called “Load Testing”. We’ve written an introduction to load testing specifically for WooCommerce.
Final Reminders
Caching can be tricky at first, but it is a necessary step that can ensure the long-term stability of your WooCommerce store. Just make sure that you fully understand the technical instructions of the caching plugins that you intend to use.
